Connect Moxie with Autocalls.ai AI voice agents
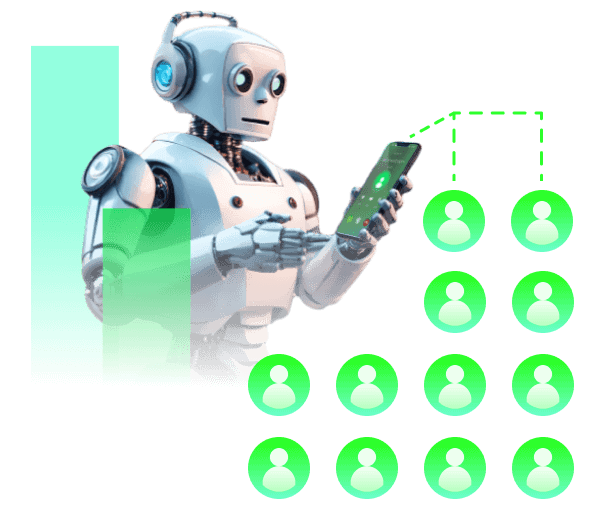
Turn Moxie updates into instant AI calls, follow-ups, and task-driven outreach. Keep freelancers and clients moving without manual dialing.
Connect Moxie triggers like Form Submitted, Meeting Scheduled, and Opportunity Created to AI calls that qualify leads and confirm next steps in minutes.
Use it with appointment booking and AI virtual receptionist workflows to reduce missed inquiries and keep your pipeline active.
When Task Created, Task Updated, or Client Task Approval triggers fire, AI voice agents can call clients, explain status changes, and collect confirmations automatically.
This call automation setup works well alongside AI call center automation and integrations to centralize communication without extra admin work.
Use Invoice Sent, Payment Received, Project Created, and Project Completed triggers to launch AI calls that remind clients, answer common questions, and improve collections.
Pair this phone integration with AI answering service and WhatsApp AI chatbot outreach for better coverage across voice and messaging.
Get a hands-on experience by trying a free demo call. Fill in your details, and our AI representative will call you instantly.
Try now a free AI call✓ No credit card required ✓ No commitment
Powerful actions you can trigger with Moxie to automate your workflows
Make a custom API call to a specific endpoint
Authorization headers are injected automatically from your connection.
Create a task in project.
ISO 8601 format date i.e. 2023-07-20
Numeric priority for sorting in kanban.
ISO 8601 format date i.e. 2023-07-20
email addresses of users in the workspace.
Exact match of a client name in your CRM
Exact match of a project that is owned by the client.
Create a new client record in moxie CRM.
ISO 3166-1 alpha-2 country code
Valid 3-Letter ISO 4217 currency code.
Creates a new project in moxie CRM.
Please enter date in YYYY-MM-DD format.
One of: Hourly, Fixed Price, Retainer, Per Item.
Please enter date in YYYY-MM-DD format.
One of: None, Overview, Full access, or Read only.
Events in Moxie that can automatically start your workflows
Triggered when an invoice is sent.
- Go to the **Workspace Settngs -> Connected Apps -> Integration** section. - Under **Custom Integration** , click on **Add Rest Hook**. - Click on **Integrations** section. - In the endpoint field, paste the following URL: ```text {{webhookUrl}} ``` - Select the event as **`Invoice Sent`** and click on **Save**.
Triggered when a new task is created.
- Go to the **Workspace Settngs -> Connected Apps -> Integration** section. - Under **Custom Integration** , click on **Add Rest Hook**. - Click on **Integrations** section. - In the endpoint field, paste the following URL: ```text {{webhookUrl}} ``` - Select the event as **`Task Created`** and click on **Save**.
Triggered when an existing task is deleted.
- Go to the **Workspace Settngs -> Connected Apps -> Integration** section. - Under **Custom Integration** , click on **Add Rest Hook**. - Click on **Integrations** section. - In the endpoint field, paste the following URL: ```text {{webhookUrl}} ``` - Select the event as **`Task Deleted`** and click on **Save**.
Triggered when an existing task is updated.
- Go to the **Workspace Settngs -> Connected Apps -> Integration** section. - Under **Custom Integration** , click on **Add Rest Hook**. - Click on **Integrations** section. - In the endpoint field, paste the following URL: ```text {{webhookUrl}} ``` - Select the event as **`Task Updated`** and click on **Save**.
Triggered when a new client is created.
- Go to the **Workspace Settngs -> Connected Apps -> Integration** section. - Under **Custom Integration** , click on **Add Rest Hook**. - Click on **Integrations** section. - In the endpoint field, paste the following URL: ```text {{webhookUrl}} ``` - Select the event as **`Client Created`** and click on **Save**.
Triggered when an existing client is deleted.
- Go to the **Workspace Settngs -> Connected Apps -> Integration** section. - Under **Custom Integration** , click on **Add Rest Hook**. - Click on **Integrations** section. - In the endpoint field, paste the following URL: ```text {{webhookUrl}} ``` - Select the event as **`Client Deleted`** and click on **Save**.
Triggered when an existing client is updated.
- Go to the **Workspace Settngs -> Connected Apps -> Integration** section. - Under **Custom Integration** , click on **Add Rest Hook**. - Click on **Integrations** section. - In the endpoint field, paste the following URL: ```text {{webhookUrl}} ``` - Select the event as **`Client Updated`** and click on **Save**.
Triggered when a new form is submitted.
- Go to the **Workspace Settngs -> Connected Apps -> Integration** section. - Under **Custom Integration** , click on **Add Rest Hook**. - Click on **Integrations** section. - In the endpoint field, paste the following URL: ```text {{webhookUrl}} ``` - Select the event as **`Form Submitted`** and click on **Save**.
Triggered when an existing meeting is updated.
- Go to the **Workspace Settngs -> Connected Apps -> Integration** section. - Under **Custom Integration** , click on **Add Rest Hook**. - Click on **Integrations** section. - In the endpoint field, paste the following URL: ```text {{webhookUrl}} ``` - Select the event as **`Meeting Updated`** and click on **Save**.
Triggered when a new project is created.
- Go to the **Workspace Settngs -> Connected Apps -> Integration** section. - Under **Custom Integration** , click on **Add Rest Hook**. - Click on **Integrations** section. - In the endpoint field, paste the following URL: ```text {{webhookUrl}} ``` - Select the event as **`Project Created`** and click on **Save**.
Triggered when an existing project is updated.
- Go to the **Workspace Settngs -> Connected Apps -> Integration** section. - Under **Custom Integration** , click on **Add Rest Hook**. - Click on **Integrations** section. - In the endpoint field, paste the following URL: ```text {{webhookUrl}} ``` - Select the event as **`Project Updated`** and click on **Save**.
Triggered when a payment is received.
- Go to the **Workspace Settngs -> Connected Apps -> Integration** section. - Under **Custom Integration** , click on **Add Rest Hook**. - Click on **Integrations** section. - In the endpoint field, paste the following URL: ```text {{webhookUrl}} ``` - Select the event as **`Payment Received`** and click on **Save**.
Triggered when a meeting is cancelled.
- Go to the **Workspace Settngs -> Connected Apps -> Integration** section. - Under **Custom Integration** , click on **Add Rest Hook**. - Click on **Integrations** section. - In the endpoint field, paste the following URL: ```text {{webhookUrl}} ``` - Select the event as **`Meeting Cancelled`** and click on **Save**.
Triggered when a new meeting is scheduled.
- Go to the **Workspace Settngs -> Connected Apps -> Integration** section. - Under **Custom Integration** , click on **Add Rest Hook**. - Click on **Integrations** section. - In the endpoint field, paste the following URL: ```text {{webhookUrl}} ``` - Select the event as **`Meeting Scheduled`** and click on **Save**.
Triggered when an existing project is completed.
- Go to the **Workspace Settngs -> Connected Apps -> Integration** section. - Under **Custom Integration** , click on **Add Rest Hook**. - Click on **Integrations** section. - In the endpoint field, paste the following URL: ```text {{webhookUrl}} ``` - Select the event as **`Project Completed`** and click on **Save**.
Triggered when a new time entry is created.
- Go to the **Workspace Settngs -> Connected Apps -> Integration** section. - Under **Custom Integration** , click on **Add Rest Hook**. - Click on **Integrations** section. - In the endpoint field, paste the following URL: ```text {{webhookUrl}} ``` - Select the event as **`Time Entry Created`** and click on **Save**.
Triggered when an existing time entry is deleted.
- Go to the **Workspace Settngs -> Connected Apps -> Integration** section. - Under **Custom Integration** , click on **Add Rest Hook**. - Click on **Integrations** section. - In the endpoint field, paste the following URL: ```text {{webhookUrl}} ``` - Select the event as **`Time Entry Deleted`** and click on **Save**.
Triggered when an existing time entry is updated.
- Go to the **Workspace Settngs -> Connected Apps -> Integration** section. - Under **Custom Integration** , click on **Add Rest Hook**. - Click on **Integrations** section. - In the endpoint field, paste the following URL: ```text {{webhookUrl}} ``` - Select the event as **`Time Entry Updated`** and click on **Save**.
Triggered when a new pipeline opportunity is created.
- Go to the **Workspace Settngs -> Connected Apps -> Integration** section. - Under **Custom Integration** , click on **Add Rest Hook**. - Click on **Integrations** section. - In the endpoint field, paste the following URL: ```text {{webhookUrl}} ``` - Select the event as **`Opportunity Created`** and click on **Save**.
Triggered when an existing pipeline opportunity is deleted.
- Go to the **Workspace Settngs -> Connected Apps -> Integration** section. - Under **Custom Integration** , click on **Add Rest Hook**. - Click on **Integrations** section. - In the endpoint field, paste the following URL: ```text {{webhookUrl}} ``` - Select the event as **`Opportunity Deleted`** and click on **Save**.
Triggered when an existing opportunity is updated.
- Go to the **Workspace Settngs -> Connected Apps -> Integration** section. - Under **Custom Integration** , click on **Add Rest Hook**. - Click on **Integrations** section. - In the endpoint field, paste the following URL: ```text {{webhookUrl}} ``` - Select the event as **`Opportunity Updated`** and click on **Save**.
Triggered when a task is moved to client approval.
- Go to the **Workspace Settngs -> Connected Apps -> Integration** section. - Under **Custom Integration** , click on **Add Rest Hook**. - Click on **Integrations** section. - In the endpoint field, paste the following URL: ```text {{webhookUrl}} ``` - Select the event as **`Client Task Approval`** and click on **Save**.
Real-world examples of how businesses use Moxie integration to automate workflows
When a Moxie form is submitted, an AI voice agent calls the lead right away. This helps qualify interest fast and book the next conversation while intent is high.
After a Meeting Scheduled trigger, the AI agent places a confirmation call with timing and key details. This reduces no-shows and gives clients a quick way to ask questions.
When an Opportunity Created event appears in Moxie, the system launches a targeted sales call. Your team reaches prospects sooner without manually reviewing the pipeline.
When Client Task Approval is triggered, an AI agent calls the client with a clear update and request. This speeds up approvals and keeps projects moving without back-and-forth emails.
As soon as an invoice is sent, AI calling can deliver a polite payment reminder and answer common billing questions. This keeps collections active without adding manual work.
After a successful qualification call, the workflow can create a new client or project in Moxie automatically. This saves admin time and keeps records updated after every conversation.
Easily manage AI voice agents without the need for programming skills.
Integrate with popular tools such as HubSpot, GoHighLevel, Zoho, Cal.com & +250 more and build automations using drag and drop.
+250 tools ready to integrate with your AI agents flow in our no-code platform, similar to Zapier or Make.
Have a question that is not answered? You can contact us at
Have a question? Contact usA Moxie phone integration connects your CRM events to AI voice calls, so actions happen automatically when records change. You can trigger outreach from forms, meetings, opportunities, invoices, and projects without relying on manual dialing.
A Moxie auto dialer helps you call leads, clients, and prospects as soon as important CRM events happen. That means faster follow-up, fewer missed opportunities, and less time spent on repetitive outreach.
Yes, Moxie AI dialer workflows can support both sales outreach and service communication. You can trigger calls from Opportunity Created, Meeting Scheduled, Task Updated, or Invoice Sent to keep every stage moving.
Moxie phone automation can handle lead qualification calls, meeting confirmations, payment reminders, project updates, and approval follow-ups. It helps teams respond faster while keeping communication consistent across every client record.
Moxie call automation launches calls the moment a trigger occurs, such as a form submission or new opportunity. This removes delays between CRM activity and outreach, which can improve contact rates and conversion speed.
Yes, a Moxie voice agent can be part of workflows that create clients, create projects, create tasks, or send custom API calls based on call outcomes. This keeps your CRM current and reduces admin after each conversation.
Join thousands of businesses already automating their phone calls with our
Moxie integration.
You can get your assistant ready in few minutes.
The full path forward. Strategy, scripts, pricing, and the operating cadence agencies use to scale a white-label voice AI business. Free PDF, delivered to your inbox.